How to Use Leave Manage
Track leave balances by month, review team requests, and apply for time off — so attendance and payroll reflect approved absences.
Open Leave Manage
Go to Leave Manage
Click Attendance → Leave Manage under Manage. Three tabs organize the page:
Members
Year-at-a-glance grid — days of leave taken per month and remaining Available balance per person (managers).
Leave Request
All team leave requests with status — review, approve, or remove records (managers).
My Requests
Your own leave history and the Apply for Leave button (every member).
Full leave features are on Elite — see Pricing under Attendance & Leaves. Configure leave types and allowances before the team starts submitting requests.
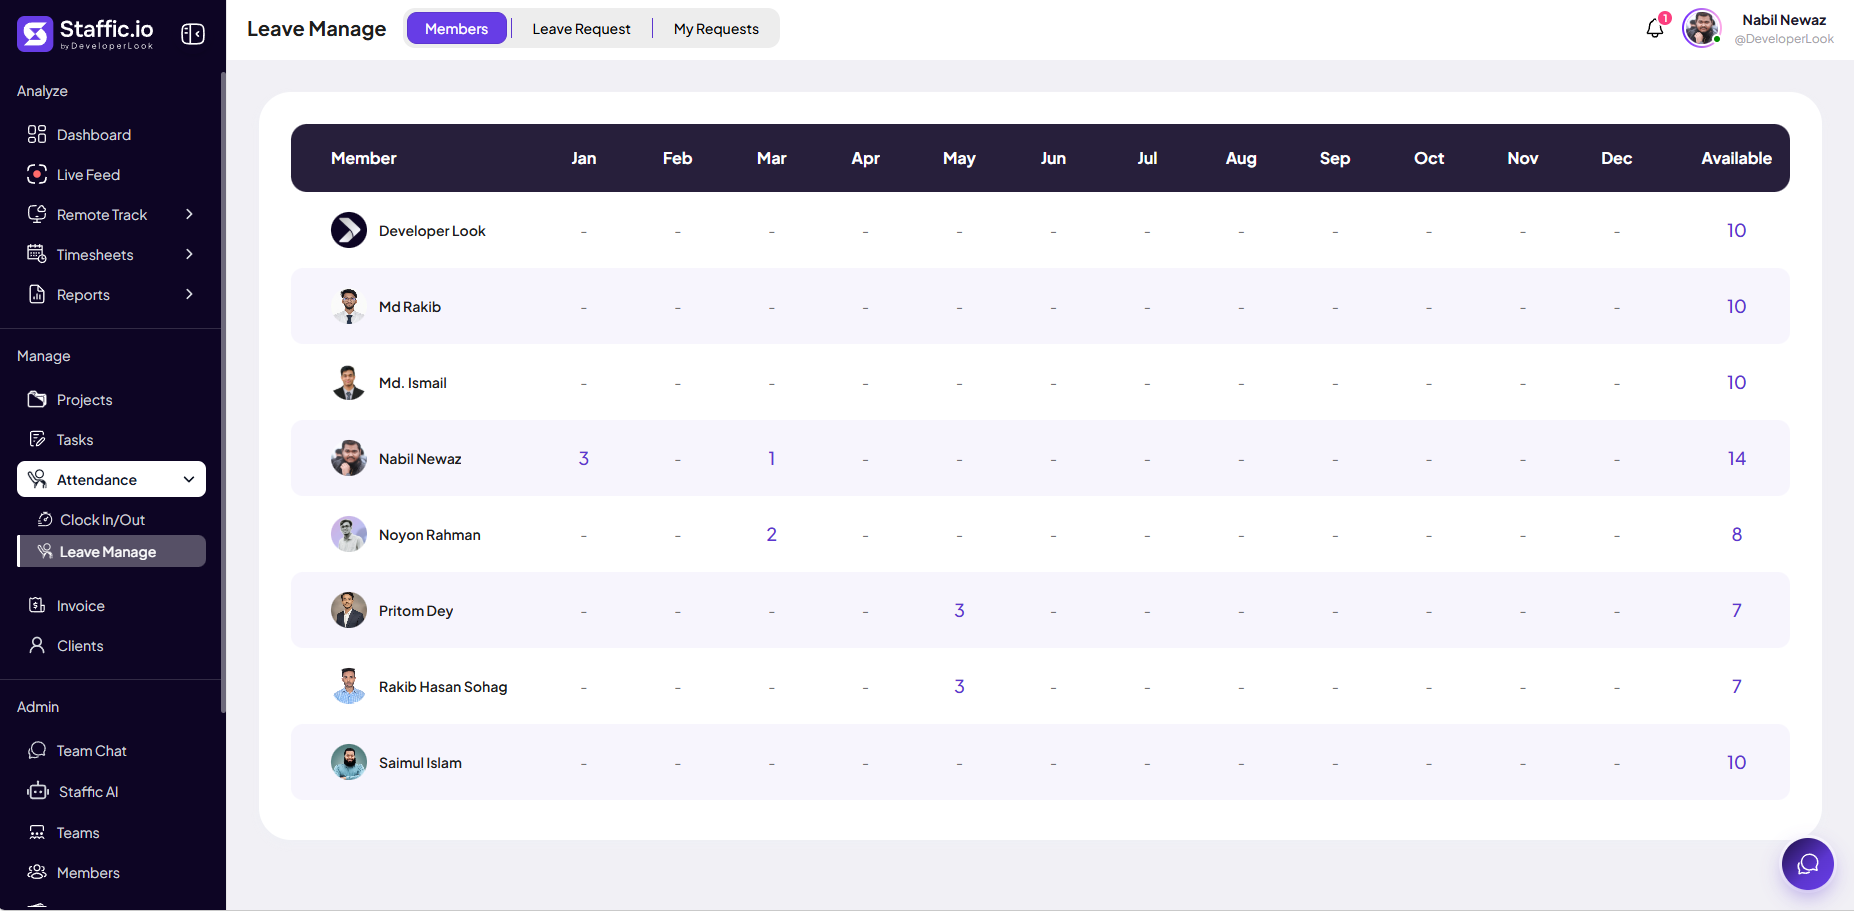
Members tab
Team leave overview
The Members tab shows each person’s leave usage across Jan–Dec. Purple numbers are days taken that month; a dash means none. The Available column is remaining balance for the period.
Capacity planning
Spot who has little leave left before approving more time off.
Year-end HR
Export or screenshot this grid for annual leave reconciliation.
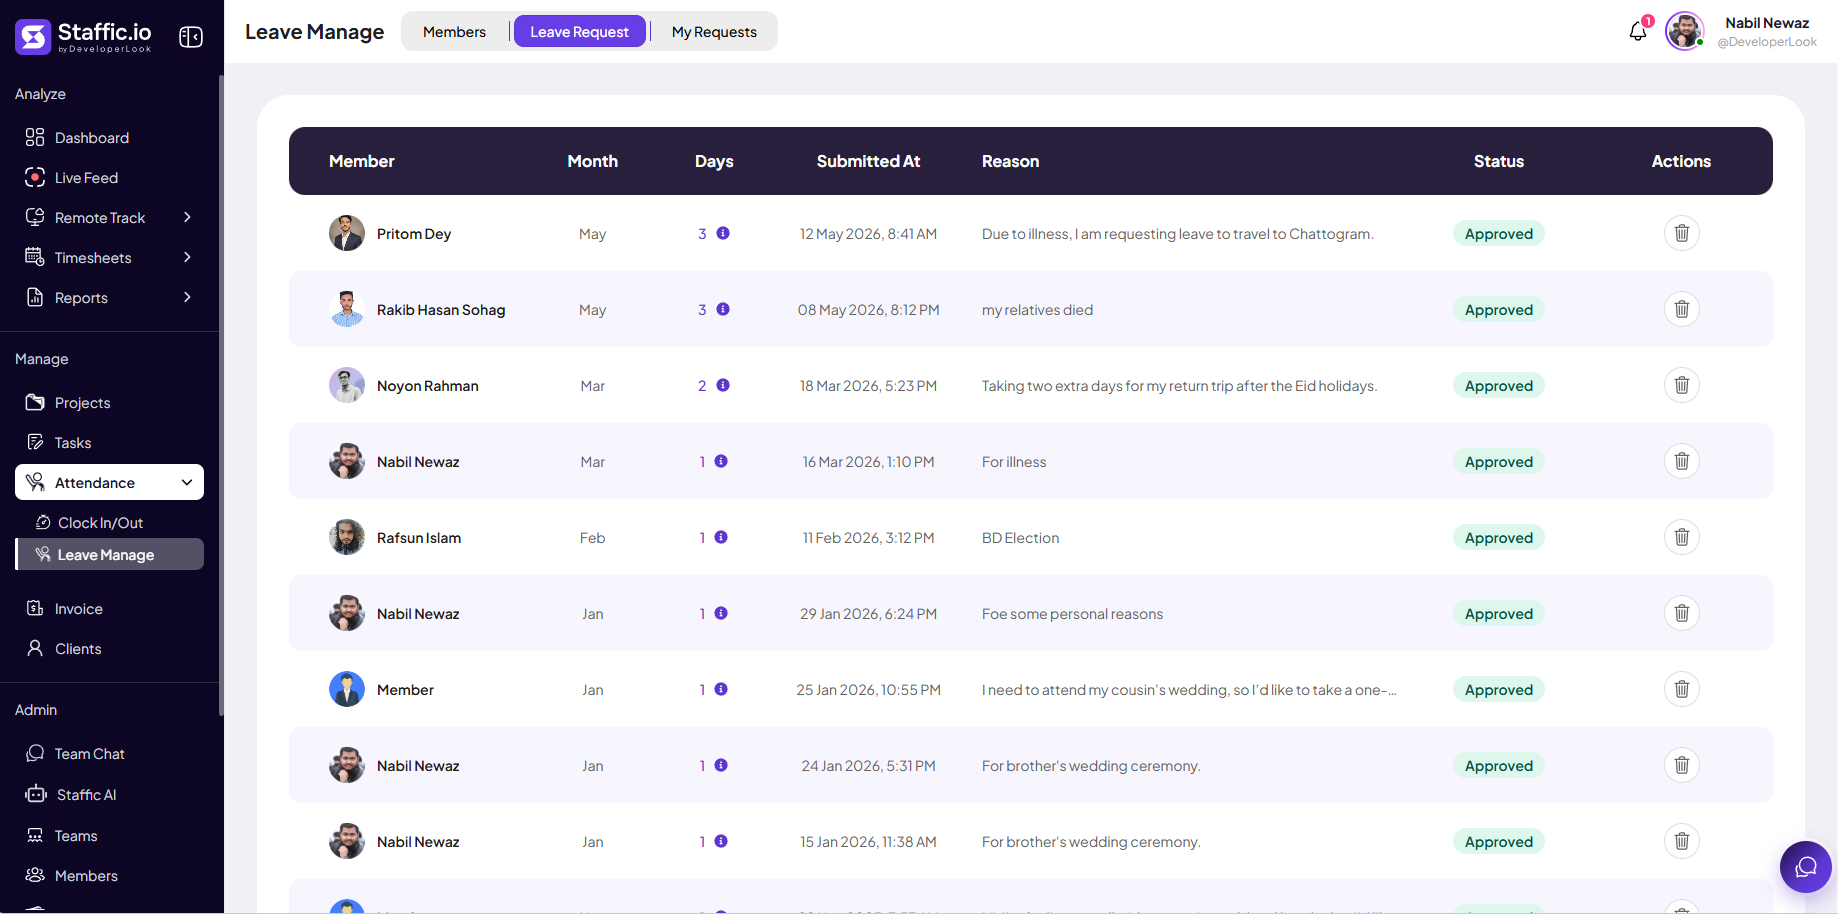
Leave Request tab
Review team requests
Managers open Leave Request to see every submission in one table.
Member
Who requested leave.
Month & Days
Which month and how many days (info icon explains the count).
Submitted At
Date and time of the request for audit trails.
Reason
Member’s note — illness, family event, election day, etc.
Status
Approved, pending, or declined — green Approved badge when accepted.
Actions
Delete or manage the record where your role allows.
Approve or decline pending rows promptly so the Members tab and Clock In/Out summaries stay accurate.
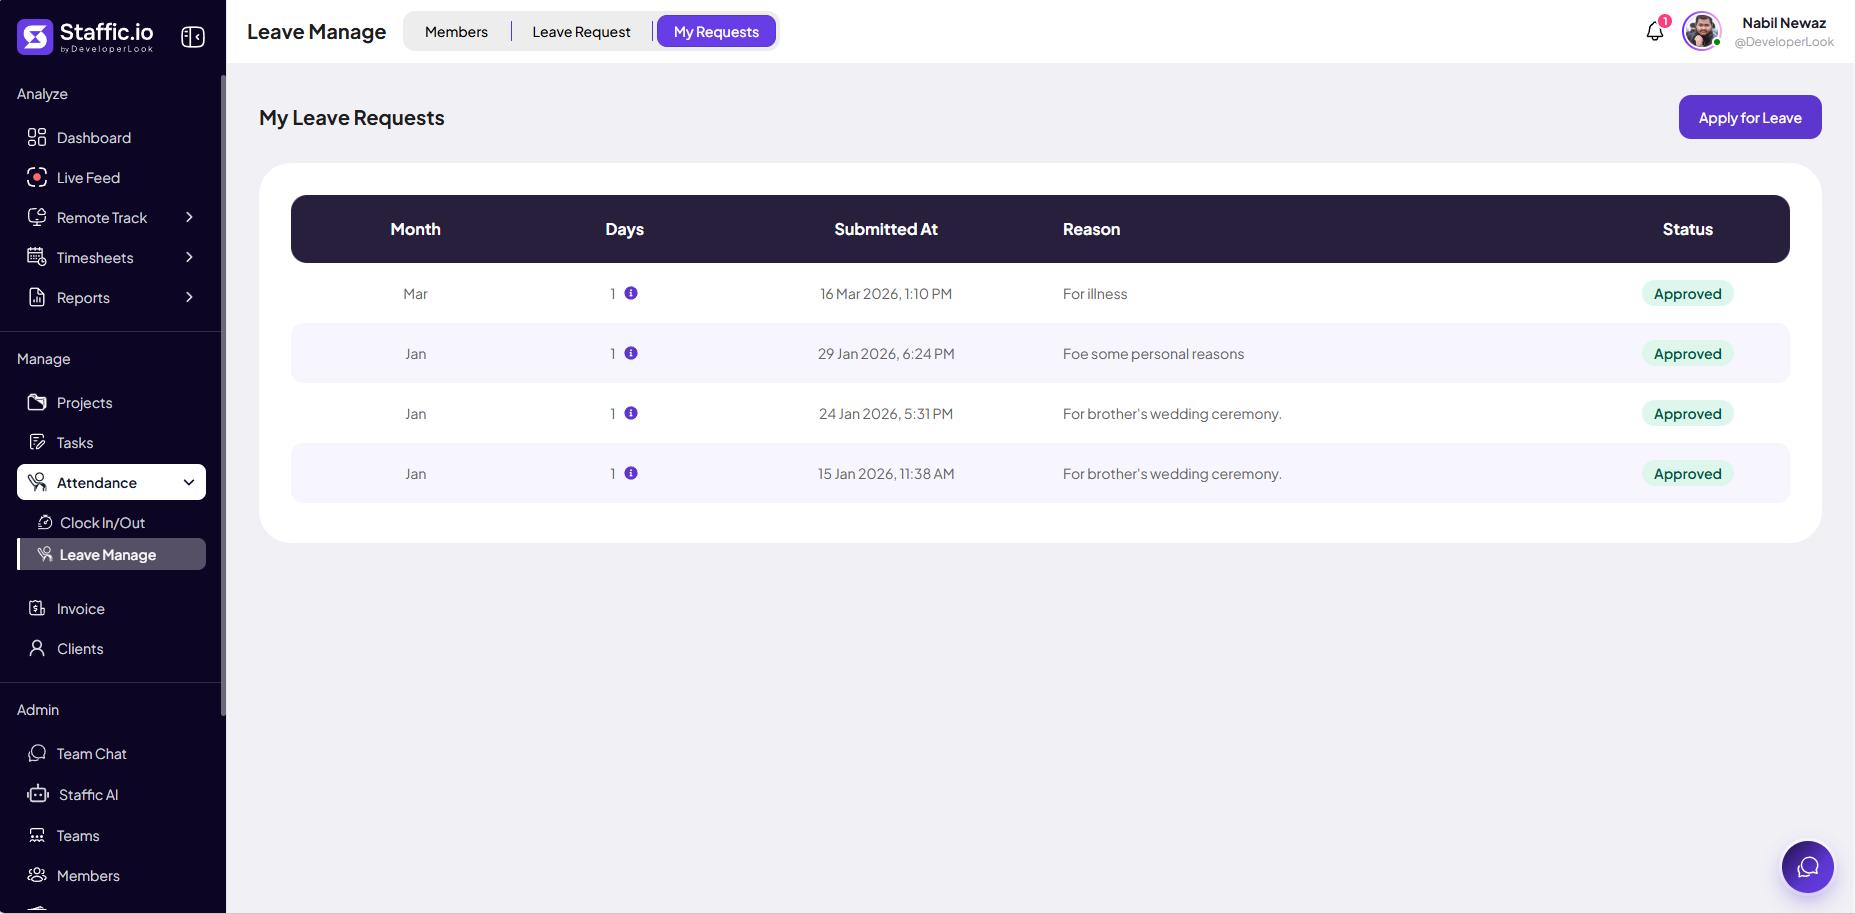
My Requests tab
Open My Requests
Open the My Requests tab. Your past requests appear in the table with Month, Days, Submitted At, Reason, and Status (for example, Approved). Click Apply for Leave to start a new request.
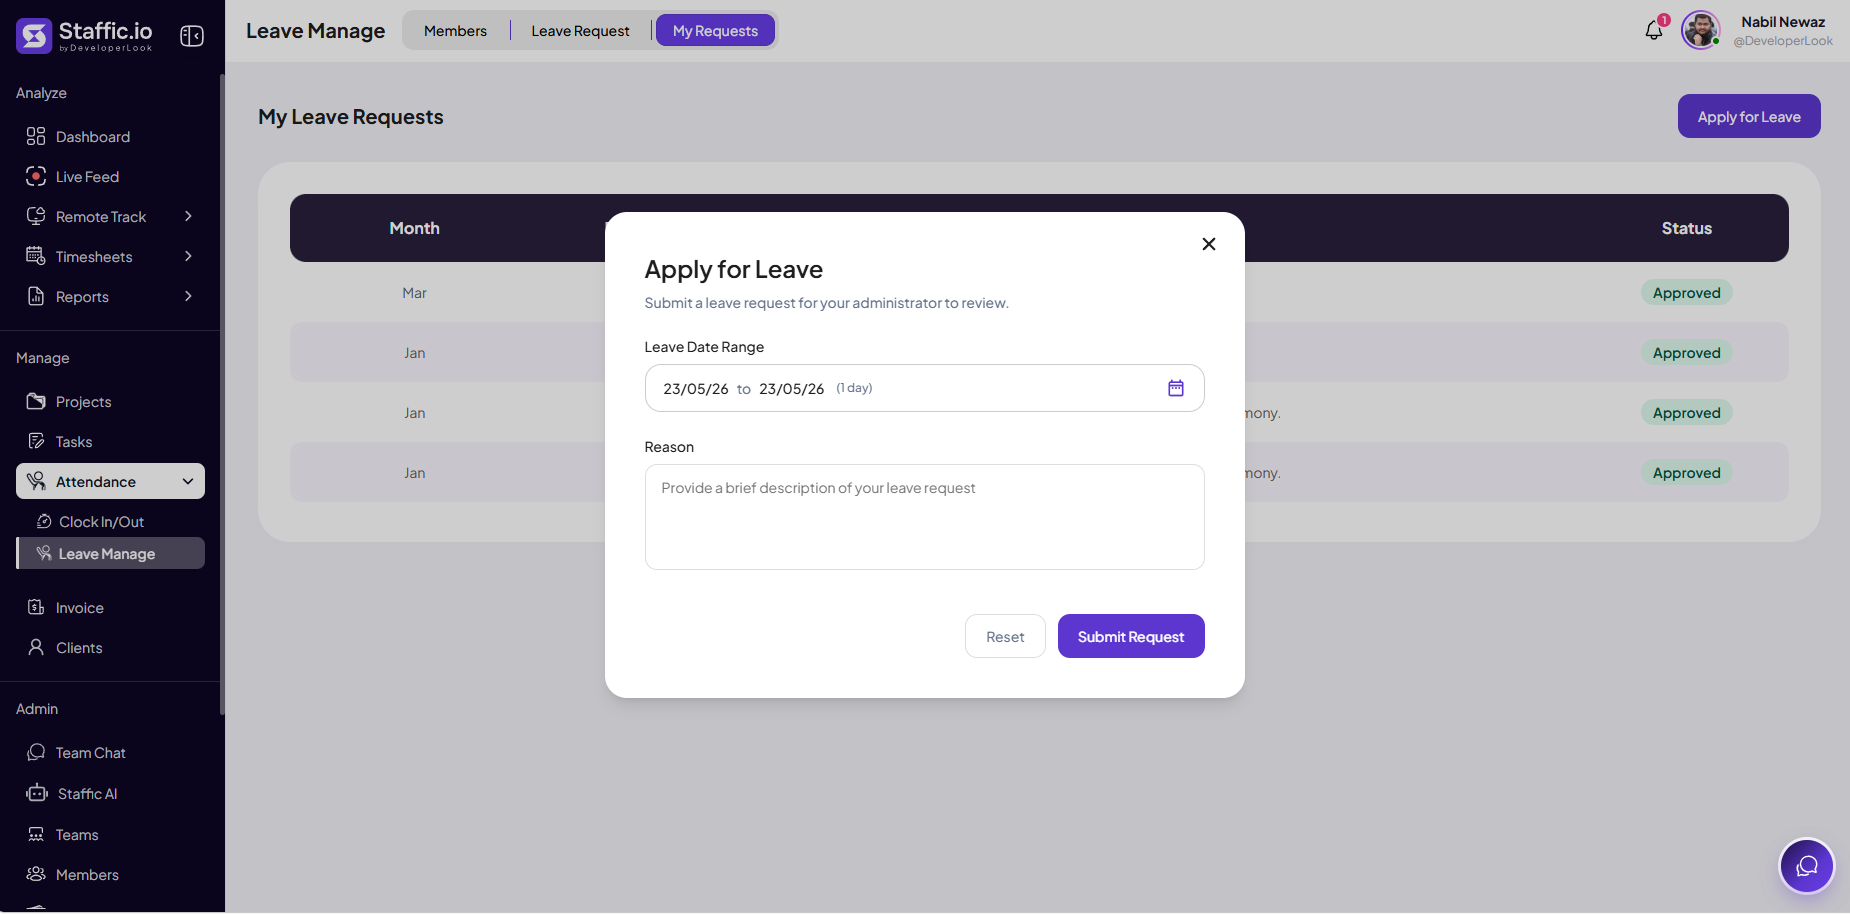
Submit the request
In the Apply for Leave modal, pick your dates and reason, then click Submit Request. Your administrator reviews it on the Leave Request tab.
Leave Date Range
Select start and end dates in the picker — the label shows the range and day count (for example, 1 day).
Reason
Brief description for your approver — illness, family event, handover notes, etc.
Reset
Clears the form if you need to start over.
Submit Request
Sends the request for admin review — status stays pending until approved or declined.
Apply before your leave starts so managers can plan coverage on Tasks → Workload.
After approval
Do not clock in on approved leave days unless policy says otherwise. Avoid logging billable time on Timesheets during full-day leave. Approved leave should show on attendance summaries, not as an unexcused absence.
Tips
- Managers: check Members for balances before approving new Leave Request rows.
- Members: use My Requests → Apply for Leave; do not ask managers to enter leave for you unless policy requires it.
- Approve or decline within one business day — pending requests block accurate planning.
- Pair approved leave with Tasks → Workload when reassigning deadlines.
Ready to get started?
Create your organization, invite your team, and start tracking in minutes.
Start Free Trial