How to Use Invoices
Create, send, and track client invoices from tracked hours or fixed fees — with tax, discounts, and status summaries in one place.
Invoices overview
Open Invoices
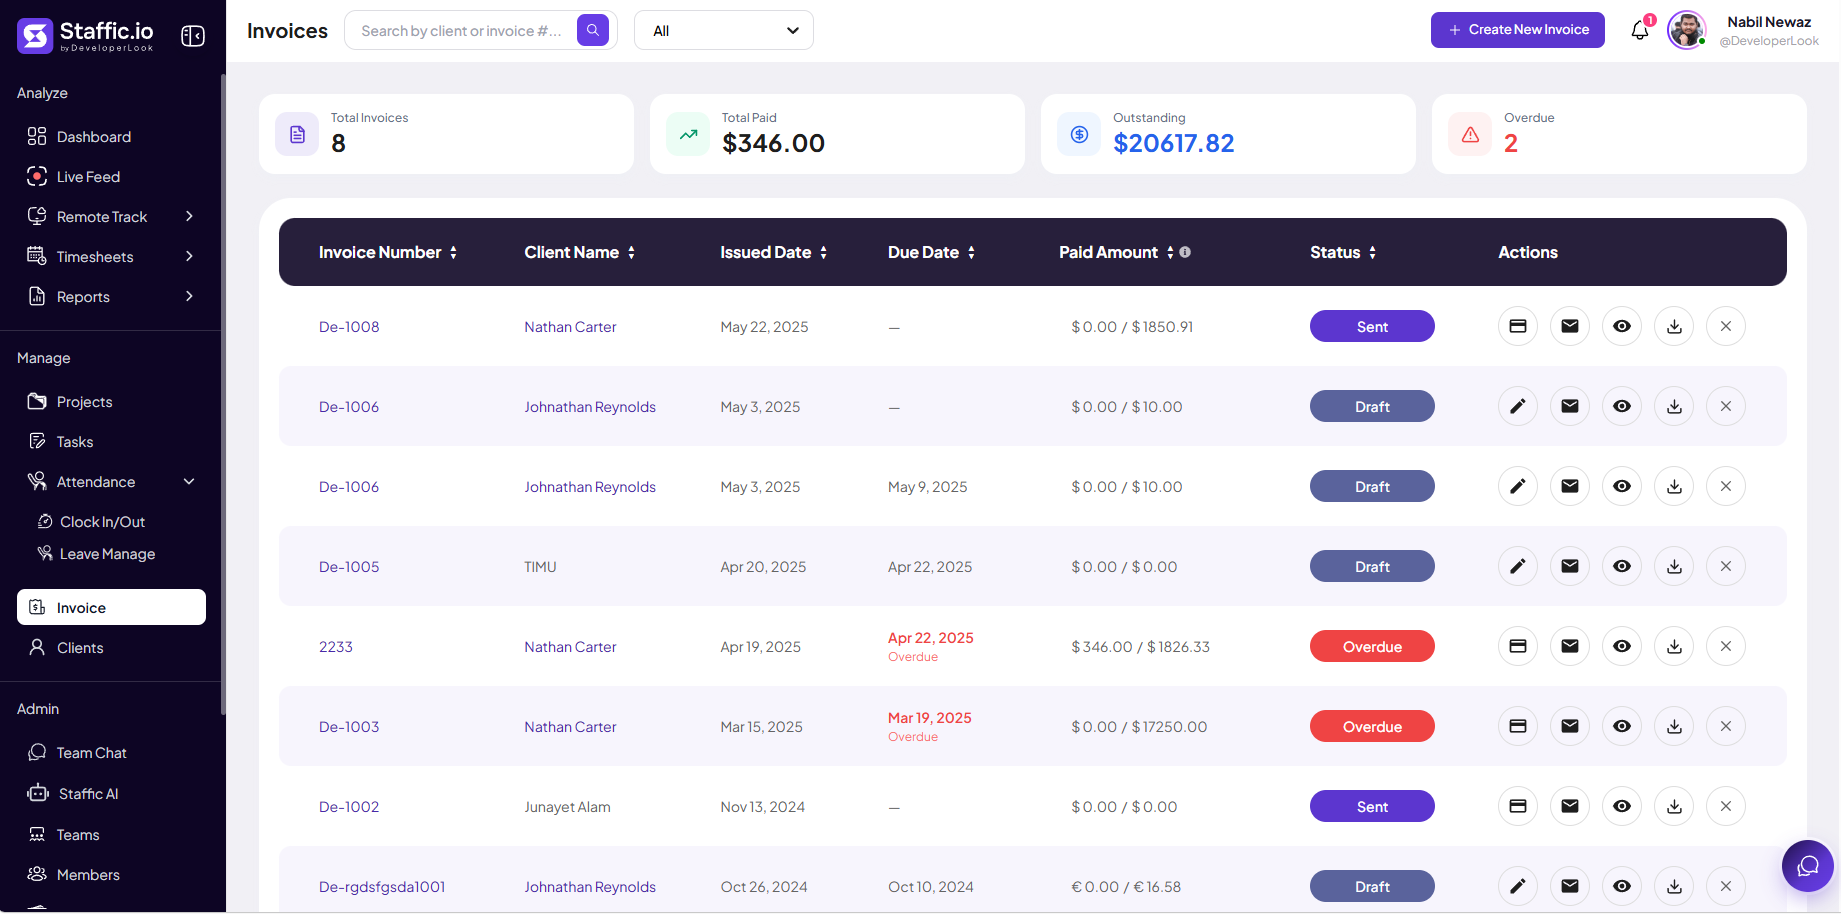
Go to Invoice under Manage in the left sidebar. Use Search by client or invoice # and the status filter (for example, All) to find a bill. Click + Create New Invoice to start a new one.
Summary cards
Four cards at the top show Total Invoices, Total Paid, Outstanding, and Overdue — use them before month-end billing runs.
Read the invoice table
Each row is one invoice:
Invoice Number & Client Name
Unique ID (for example, De-1008) and the client billed.
Issued Date & Due Date
Due dates past today show in red with an Overdue label.
Paid Amount
Paid vs total (for example, $346.00 / $1,826.33) — supports USD and other currencies.
Status
Draft (preparing), Sent (dispatched), or Overdue (unpaid past due date).
Actions
Record payment (card icon), edit (drafts), send email, view, download PDF, or delete where allowed.
Full invoicing (hours worked, fixed fee, products) is on Elite — see Pricing under Client & Invoice.
Create an invoice
Invoice details
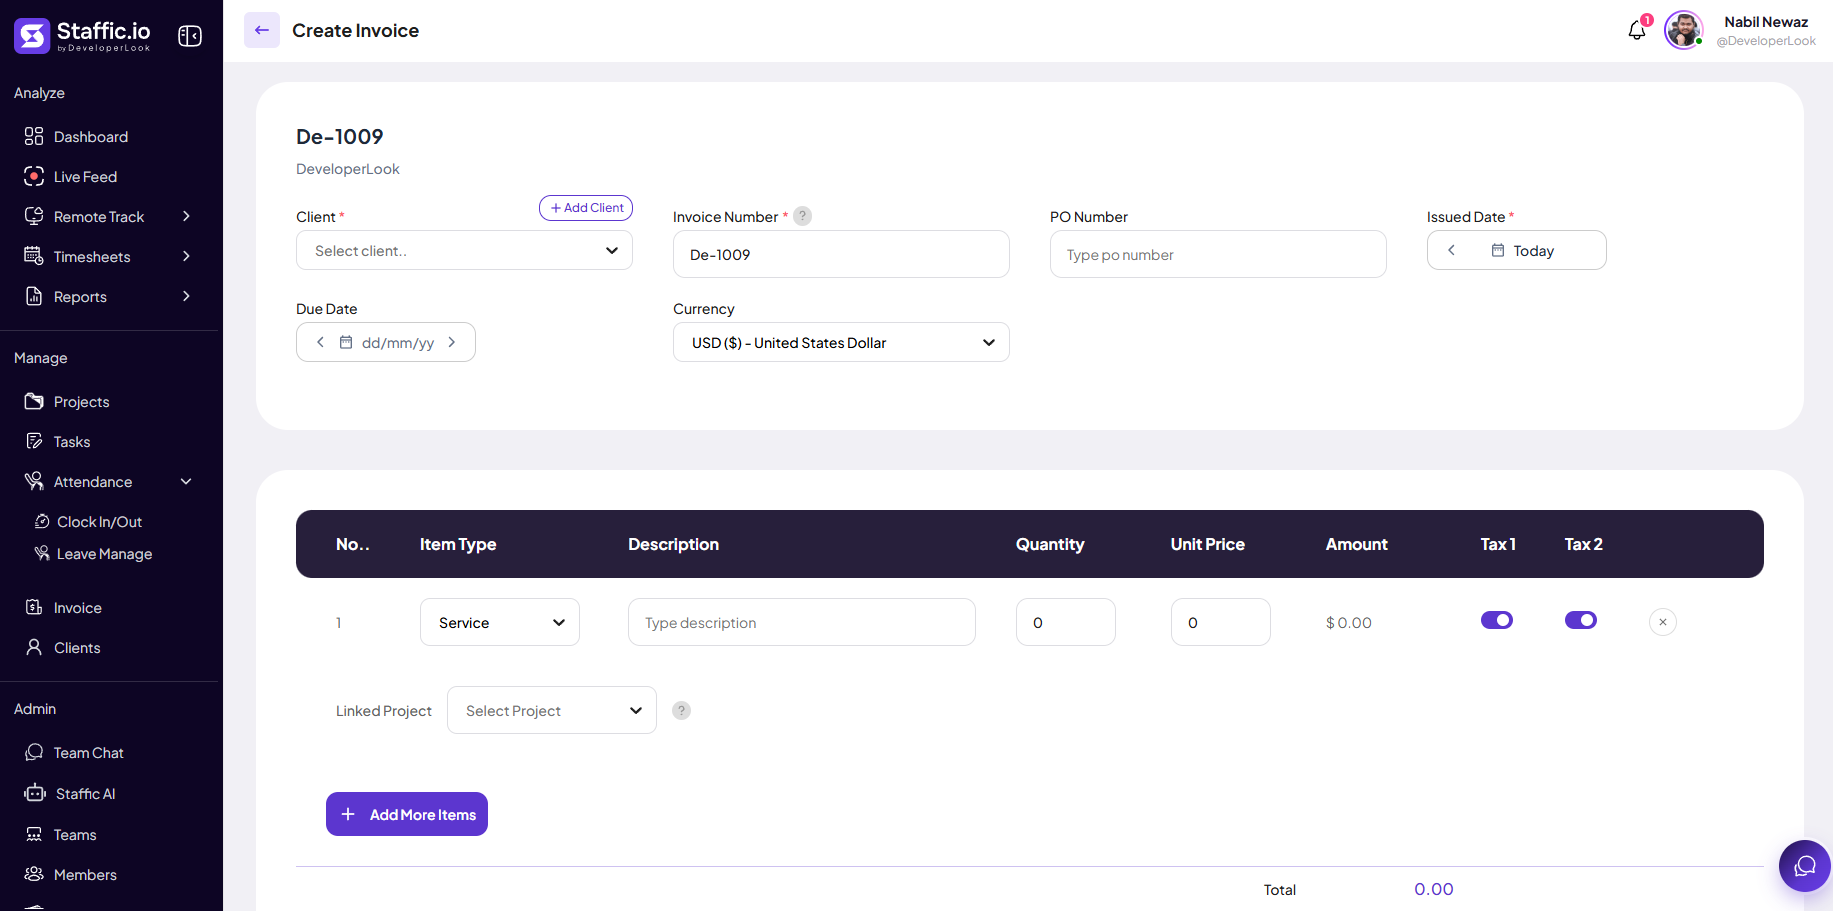
After + Create New Invoice, fill the header section:
Client
Select from Choose client or click + Add Client to create one under Manage → Clients.
Invoice Number
Auto-generated ID (for example, De-1009) — edit if your process requires a specific format.
PO Number
Optional purchase order reference from the client.
Issued Date & Due Date
Issued defaults to Today; set Due Date for overdue tracking on the list.
Currency
USD or other supported currency for the entire invoice.
Line items, tax, and total
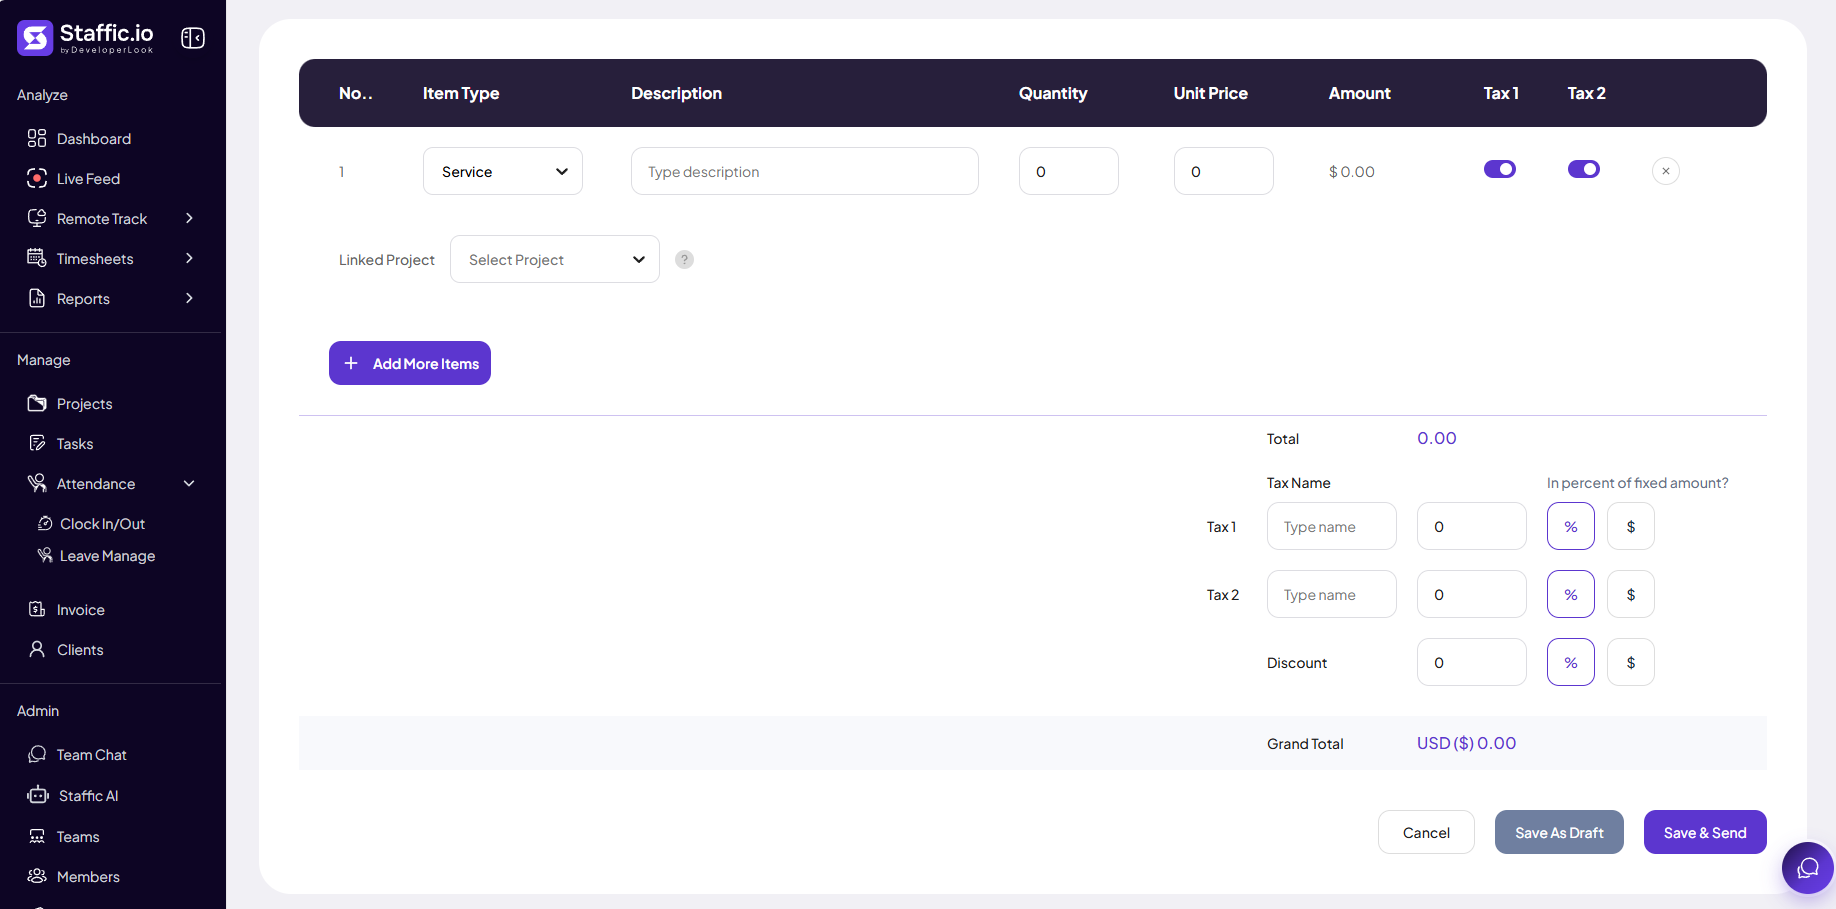
Add rows for services or products, link a Project when billing tracked work, then set tax and discount before saving.
Item row
Item Type (Service), Description, Quantity, Unit Price, Amount — toggle Tax 1 and Tax 2 per line.
Linked Project
Tie the line to a project so hours from Timesheets can align with the invoice.
+ Add More Items
Add additional service or product lines.
Tax & Discount
Tax Name, rate as % or $, and discount — Grand Total updates in the selected currency.
Save As Draft
Keep editing later — status stays Draft on the list.
Save & Send
Finalize and dispatch — status moves to Sent; use envelope action to resend if needed.
Billing workflow
From tracked time
Approve Timesheets for the period, confirm hours in Reports → Project Timing or Monthly Timesheet, then create the invoice and link line items to the correct Projects.
Record payment
When the client pays, use the payment action on the row to update Paid Amount — Total Paid on the summary cards updates automatically.
Tips
- Link each invoice to a Client before sending — create clients under Manage → Clients first.
- Use Save As Draft until rates and hours are reconciled with Timesheets.
- Download PDF from row actions for records the client did not receive by email.
- Watch the Overdue card weekly and follow up on Sent invoices past due date.
Ready to get started?
Create your organization, invite your team, and start tracking in minutes.
Start Free Trial